Microsoft now puts a lot of effort to be able to create hybrid apps via Blazor. This could be one of many reasons, why we got a very powerful WebView2, which is based on Microsoft Edge and which work with WinForms, WPF, but also with .NET MAUI. This comes with very nice API, by which we can communicate from native apps to JavaScript website (and back). Let’s take a look how we can create a basic hybrid app. We’ll create an UI using Vue.js and use some native features, which we can access only from native apps (in our case we’ll use WPF).
The app will consists of two projects – Vue.js app and WPF app. WPF app would be a simple app, the whole native functionality would be implemented in MainWindow and MainWindowViewModel classes (and related services and classes). Vue.js app would consist of two components, which will both implement different functionality (ToastNotification and ComputerInfo).
Since we want to use MVVM pattern and Dependency Injection (with PRISM), there are some obstacles, which we need to overcome. In MVVM pattern we create for each View one View Model (where we implement the functionality, which View should have). The main problem here is, that in WPF we can access the WebView methods and events from View and not directly from View Model. You can read how to overcome these issues later in this article.
Setting up the WebView
Firstly, it’s necessary to install the NuGet package, which includes the new WebView2 control – package is called Microsoft.Web.WebView2.

We can then add the WebView control to our MainWindow. Let’s open the MainWindow.xaml and paste there following code (the namespace for WebView can differ in your app):
<wpf:WebView2 x:Name="webView" />As the next step, we have to set up the WebView in a way that it can access the Vue app from a local folder. We can achieve this by using method called SetVirtualHostNameToFolderMapping. This can create for us a virtual host name, which we can use as an url for the WebView. Before defining the virtual host name, we trigger the initialization of the WebView control by calling EnsureCoreWebView2Async.
private async Task InitializeWebView()
{
    await AssociatedObject.EnsureCoreWebView2Async();

    AssociatedObject.CoreWebView2.SetVirtualHostNameToFolderMapping(hostName: "vueapp", folderPath: "..\\..\\..\\..\\vueproject\\dist", accessKind: CoreWebView2HostResourceAccessKind.Allow);
    AssociatedObject.CoreWebView2.Navigate("https://vueapp/index.html");
}
I encapsulated the functionality in a behavior. If you do so, don’t forget to add the behavior definition to your XAML code.
<wpf:WebView2 x:Name="webView">
    <i:Interaction.Behaviors>
       <behaviors:WebViewInitializationBehavior />
    </i:Interaction.Behaviors>
</wpf:WebView2>
Toast notifications
Let’s start with something simple. We’ll create a UI where user could type the text of the toast notification. When the text is confirmed, the native app will be notified and display the notification with the desired text.
We start with Vue.js app. Let’s create a simple component called ToastNotification. It will consist of one input (where user writes the message to be displayed) and a button to confirm the displaying of a toast notification.
<template>
  <div>
    <h2>Toast notification</h2>
    <div id="message">
      <form>
        <label for="fname">Message:</label>
        <input type="text" id="fname" name="fname" v-model="message" />
      </form>
      <button @click="sendMessage">Send message to WPF app!</button>
    </div>
  </div>
</template>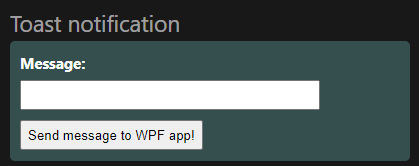
The most important part is (of course) in Javascript code. We’ll prepare one property called message, which is bound to the message input. Then we’ll bind the button’s onClick event to a new method called sendMessage. This method will use a WebView API, which will send the message from the Vue app and the WPF app would be able to consume it. To implement such a feature we need to use postMessage method. We’ll send a simple JSON string as a parameter of the method.
<script setup>
import { ref } from "vue";

const message = ref("");
const sendMessage = () => {
  window.chrome.webview.postMessage({
    type: "notification",
    text: message.value,
  });
};
</script>
Vue app is now prepared, let’s continue with the WPF app. We must react to the received message and we can achieve that by listening to WebMessageReceived event of the WebView. Since we are using MVVM, we want to get and process the message in ViewModel and not in View. To overcome this, Prism provides a way how to bind events to commands called InvokeCommandAction. We bind WebMessageReceived event to OnWebMessageReceivedCommand, which we define in MainWindowViewModel.
        <wpf:WebView2 x:Name="webView">
            <i:Interaction.Triggers>
                <i:EventTrigger EventName="WebMessageReceived">
                    <prism:InvokeCommandAction Command="{Binding OnWebMessageReceivedCommand, Mode=OneTime}" />
                </i:EventTrigger>
            </i:Interaction.Triggers>
            <i:Interaction.Behaviors>
                <behaviors:WebViewInitializationBehavior />
                <behaviors:WebViewPostMessageBehavior />
            </i:Interaction.Behaviors>
        </wpf:WebView2>
Now let’s create the toast notification functionality itself. For this, we would need to install another NuGet package – for purpose of this article we’ll use Microsoft.Toolkit.Uwp.Notifications.

The toast notification functionality would be encapsulated in ToastNotificationService. There would be just a simple method called ShowNotification, which creates and displays the notification.
        public void ShowNotification(string text)
        {
            new ToastContentBuilder().AddText("Message from Vue JS!")
                                     .AddText(text)
                                     .Show();
        }
Now let’s make some changes in MainWindowViewModel. We need to add the OnWebMessageReceivedCommand and its implementation (WebMessageReceived method). We need to inject the ToastNotificationService (or more precisely its interface) to the MainWindowViewModel. We also need to create a WebViewMessage class, which is necessary to deserialize the message coming from the WebView. Then we are ready to finish the first part of our app.
        private void WebMessageReceived(CoreWebView2WebMessageReceivedEventArgs e)
        {
            var message = JsonSerializer.Deserialize<WebViewMessage>(e.WebMessageAsJson, serializerOptions);

                _toastNotificationService.ShowNotification(message.Text);
        }
Reading data from command prompt
Now let’s try also to get the data from the WPF app. We will use a systeminfo command in the command prompt to get some information of the system and the computer and then pass and display the data in the Vue.js app.
We’ll start again with creating another simple UI in Vue.js. We’ll create a new component called ComputerInfo. In this component we’ll create five inputs, which would display our data. Additionally, we’ll create one button, which triggers the reading from command prompt for us.
<template>
  <div>
    <h2>Computer information</h2>
    <div id="cmdData">
      <form>
        <label for="osname">OS Name:</label>
        <input
          type="text"
          id="osname"
          name="osname"
          v-model="computerInfo.osName"
          readonly
        />
        <label for="osver">OS Version:</label>
        <input
          type="text"
          id="osver"
          name="osver"
          v-model="computerInfo.osVersion"
          readonly
        />
        <label for="sysman">System Manufacturer:</label>
        <input
          type="text"
          id="sysman"
          name="sysman"
          v-model="computerInfo.systemManufacturer"
          readonly
        />
        <label for="sysmodel">System Model:</label>
        <input
          type="text"
          id="sysmodel"
          name="sysmodel"
          v-model="computerInfo.systemModel"
          readonly
        />
        <label for="totalmem">Total Memory:</label>
        <input
          type="text"
          id="totalmem"
          name="totalmem"
          v-model="computerInfo.totalMemory"
          readonly
        />
      </form>
      <button @click="getData">Get computer info</button>
    </div>
  </div>
</template>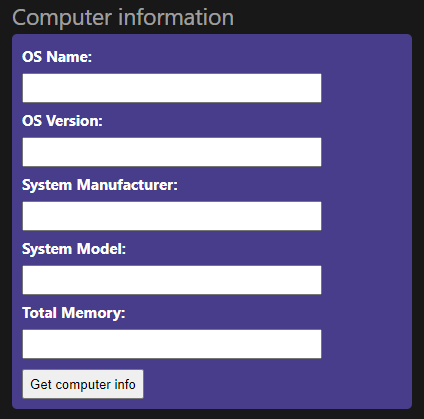
Now we have the UI, but we have to add the functionality. As a first thing, we create an reactive object called computerInfo to which we can bound our UI elements. This we will create easily by adding following code snippet to <script setup> part of component.
<script setup>
import { reactive } from "vue";

const computerInfo = reactive({
  osName: "",
  osVersion: "",
  systemManufacturer: "",
  systemModel: "",
  totalMemory: "",
});
</script>
Now we have to implement the functionality of the button. We’ll simply follow the implementation in ToastNotification component and use the postMessage method of WebView API. We’ll just send a different JSON string in the body of the message. We’ll bound button’s onClick event to a new method called getData (in the same way as in ToastNotification component).
const getData = () => {
  window.chrome.webview.postMessage({
    type: "request",
  });
};
The last thing we need to do is an event listener. The event listener would invoke a method, by which we get message back from the WPF app. This method will just update data of the computerInfo object (and displays the results in UI).
window.chrome.webview.addEventListener("message", (message) => {
  computerInfo.osName = message.data.osName;
  computerInfo.osVersion = message.data.osVersion;
  computerInfo.systemManufacturer = message.data.systemManufacturer;
  computerInfo.systemModel = message.data.systemModel;
  computerInfo.totalMemory = message.data.totalMemory;
});
By implementing this, we finished the javascript part. Now let’s move to the WPF app again. For getting the message, we use our OnWebMessageReceivedCommand, which we prepared earlier and we’ll just modify the WebMessageReceived method (in MainWindowViewModel), because our application needs to know, if we want to display the notification or get the data from the command prompt. We also need to create WebMessagePosted event to notify the WebView and pass the obtained data to Vue.js app. For the purpose of serialization of JSON data (since we are passing the JSON string to the WebView), we need to create ComputerInfoMessage class.
        private void WebMessageReceived(CoreWebView2WebMessageReceivedEventArgs e)
        {
            var message = JsonSerializer.Deserialize<WebViewMessage>(e.WebMessageAsJson, serializerOptions);

            if (message.Type == "request")
            {
                var data = _commandLineService.GetComputerInfo();

                WebMessagePosted?.Invoke(this, JsonSerializer.Serialize<ComputerInfoMessage>(data, serializerOptions));
            }
            else
            {
                _toastNotificationService.ShowNotification(message.Text);
            }
        }
The functionality related to getting the data from the prompt are implemented in CommandLineService. There is only one method called GetComputerInfo which returns object of type ComputerInfoMessage containing the computer info data. I will not discuss here implementation of the method, which gets the data from command prompt, because this is not an objective of this article. If you are interested, please review the code of CommandLineService.
Now we need to pass the data via the WebView to Vue.js app. As I mentioned earlier, WebView API is accessible from View. To overcome this, we previously created event WebMessagePosted. We will subscribe to this event and when the ViewModel triggers it, we will pass the data to Vue.js app. Let’s create another Behavior for this and encapsulate this functionality inside. To pass data from WPF app to Vue.js app, we need to use WebView method called PostWebMessageAsJson.
    public class WebViewPostMessageBehavior : Behavior<WebView2>
    {
        protected override void OnAttached()
        {
            base.OnAttached();

            var viewModel = (MainWindowViewModel)AssociatedObject.DataContext;
            viewModel.WebMessagePosted += ViewModel_WebMessagePosted;
        }

        private void ViewModel_WebMessagePosted(object sender, string e)
        {
            AssociatedObject.CoreWebView2.PostWebMessageAsJson(e);
        }

        protected override void OnDetaching()
        {
            var viewModel = (MainWindowViewModel)AssociatedObject.DataContext;
            viewModel.WebMessagePosted -= ViewModel_WebMessagePosted;

            base.OnDetaching();
        }
    }
Don’t forget to attach the behavior to WebView in XAML code of MainWindow.
<wpf:WebView2 x:Name="webView">
<i:Interaction.Triggers>
<i:EventTrigger EventName="WebMessageReceived">
<prism:InvokeCommandAction Command="{Binding OnWebMessageReceivedCommand, Mode=OneTime}" />
</i:EventTrigger>
</i:Interaction.Triggers>
<i:Interaction.Behaviors>
<behaviors:WebViewInitializationBehavior />
<behaviors:WebViewPostMessageBehavior />
</i:Interaction.Behaviors>
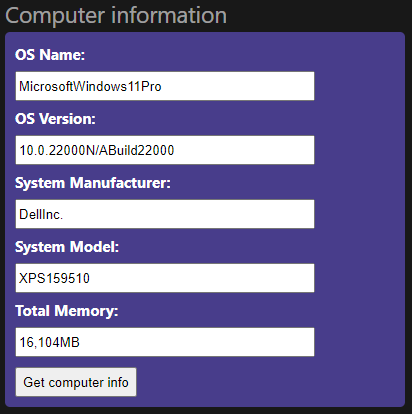
</wpf:WebView2>Now we are ready to test getting the data from the command prompt.
Conclusion
And that’s all for this article. I tried to show you here, how you can create a basic hybrid app in WPF using WebView and Vue.js. I skipped some parts such as CSS styling or CommandLineService functionality, because this was not the objective of the article. If you are interested in these parts, feel free to review the whole project on my GitHub.
You can also continue to watch the video from Carl Franklin and DevExpress, where WebView in WPF is discussed more thouroughly.
Sources